Table of Contents
ToggleYour home’s entrance sets the tone for visitors and passersby, and once the sun drops, proper outdoor lighting sconce placement can be the difference between an inviting entryway and a shadowy void. Outdoor sconces aren’t just functional fixtures: they’re design anchors that frame doorways, illuminate pathways, and add layers of sophistication to your home’s exterior. Whether you’re a seasoned DIYer or tackling your first lighting project, understanding sconce styles, placement, and installation fundamentals will help you choose fixtures that suit your home’s architecture while delivering reliable, attractive light. This guide walks you through everything you need to know to select and install outdoor sconces that actually work.
Key Takeaways
- Outdoor lighting sconces improve safety at entry points while serving as visible architectural features that enhance curb appeal and create a welcoming atmosphere for guests.
- Choose sconce styles that match your home’s architecture—modern fixtures suit contemporary homes, while traditional designs work best with farmhouse or colonial styles.
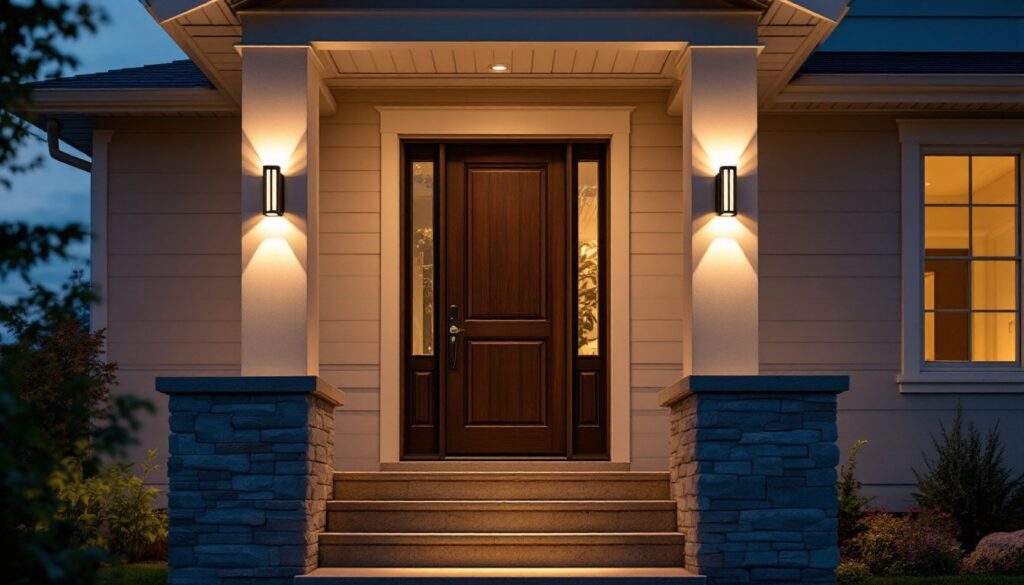
- Mount outdoor lighting sconces 12–18 inches above door headers (or 8–10 feet apart along pathways) using IP54-rated or higher weatherproof fixtures with corrosion-resistant fasteners.
- Select fixtures based on light output in lumens, color temperature (warm 2700K for cozy ambiance, cool 4000K+ for security), and ensure adequate electrical capacity with GFCI protection.
- Proper installation requires running UV-rated outdoor cable, sealing the fixture back plate with exterior-grade silicone caulk to prevent water damage, and grounding the fixture to prevent electrical hazards.
- Maintain outdoor sconces by cleaning lens panels twice yearly, inspecting caulk seals annually, and checking drainage holes to prevent water pooling and corrosion.
What Are Outdoor Lighting Sconces and Why They Matter
An outdoor lighting sconce is a wall-mounted fixture that directs light downward or outward, typically installed beside doors, under eaves, or along exterior walls. Unlike overhead pendant lights or ground-level path lights, sconces attach directly to your home’s siding or trim, making them ideal for task lighting at entry points and accent lighting along a porch.
Sconces serve multiple purposes. They improve safety by illuminating steps and entrance areas, reduce the risk of trips and falls during evening hours, and create welcoming ambient light that extends your outdoor living season. Beyond function, they’re highly visible architectural features, often the first lighting element visitors notice. This dual role (practical plus aesthetic) makes sconce selection critical to both curb appeal and home security.
When choosing sconces, consider the fixture’s light output (measured in lumens), color temperature (warm 2700K for cozy, cool 4000K+ for security), and mounting height. Most exterior sconces sit 12–18 inches above doorways or 10–12 feet apart along a porch or pathway. For the best results, plan your layout before purchase so you can size and space fixtures proportionally to your home’s scale.
Types of Outdoor Sconces for Every Design Style
Modern and Contemporary Styles
Modern outdoor sconces emphasize clean lines, minimalist geometry, and integration with smart-home systems. Think geometric squares, integrated LED modules, and finishes like matte black, brushed stainless steel, or charcoal gray. Many contemporary models include dimmable and color-tunable LEDs, letting you adjust warmth and brightness from your phone.
These fixtures work best on homes with flat fascias, minimal trim, and contemporary siding, think mid-century modular designs or new builds. Typical wattage ranges from 12–18W for LED equivalents, delivering 800–1200 lumens per fixture. They’re often weatherproof rated IP54 or higher, meaning they resist water spray from any direction. When shopping, look for fixtures certified by the Illuminating Engineering Society (IES) so you can confirm light distribution patterns and efficiency claims.
Traditional and Rustic Designs
Traditional sconces draw from historic lighting styles, coach lamps, barn fixtures, and lantern-style enclosures with glass panels. Finishes include oil-rubbed bronze, aged copper, brushed brass, and black wrought iron. Many feature acanthus leaf details, curved arms, or period-appropriate materials like wood or ceramic accents.
Rustic sconces pair well with farmhouse, cottage, and colonial architecture. They typically use A19 or A21 incandescent-compatible sockets, though modern LED equivalents in warm 2700K tones work perfectly here. Expect 60W equivalent output per bulb, roughly 800 lumens. These fixtures often have deeper enclosures to shade the bulb, which can actually improve visual comfort by reducing glare. If you go the incandescent route, budget for more frequent bulb replacement: LED retrofit bulbs cost more upfront but last 15+ years and save energy costs.
How to Choose the Right Sconce for Your Space
Start by assessing your home’s architectural style. Walk around your entryway and take a photo at dusk, lighting design works in context. Notice the color of your siding (light or dark), trim materials, and existing hardware finishes. A contemporary glass-front sconce on a Victorian-style home will clash: conversely, a wrought-iron coach lamp on a modern minimalist facade looks out of place.
Next, measure your entry door height and width, then note where you’d mount fixtures. Standard practice places scones 12–18 inches above the door header, spaced symmetrically on both sides. For pathway lighting, space sconces 8–10 feet apart at a lower height (8–10 feet off ground). If your entry has no mounting surface (stucco, stone, or curved trim), you may need a special bracket, this is worth identifying during the planning phase.
Consider light output versus overlap. Two 900-lumen sconces on either side of a standard 3-foot entry create good ambient light without harsh shadows. For patios or larger porches, check outdoor lighting sconce guides to visualize layouts: spacing and lumen output both affect how welcoming the space feels at night. Check that fixtures carry an IP rating of at least IP54 (better yet, IP65 for coastal or high-moisture zones) so they withstand rain, salt spray, and temperature swings.
Finally, confirm your home’s electrical capacity. Most sconce circuits run on a standard 15A breaker and can safely handle multiple fixtures. But, if you’re adding sconces to a panel that’s already near capacity or the circuit is shared with high-draw appliances, consult a licensed electrician before proceeding. Many pros recommend having a dedicated outdoor lighting circuit running to a GFCI-protected outlet or breaker, not just for safety, but to prevent nuisance trips from moisture.
Installation and Maintenance Best Practices
Before You Start
Turn off power at the breaker and verify the circuit is de-energized using a voltage tester. Wear safety glasses and gloves, you’ll likely be working overhead or on a ladder. If you’re running new cable, check local codes: most jurisdictions require outdoor wiring to be buried 12 inches deep (or in rigid conduit if shallower), and the circuit must terminate in a GFCI-protected box.
If an outlet or existing fixture is already in place, you can often repurpose that junction box. Verify it’s rated for wet locations (usually marked “WR” on the box). If relocating or installing fresh, you may need a permit, don’t skip this step. Inspectors look for proper grounding, GFCI protection, and cable buried or protected to code.
Installation Steps
- Mark mounting points using a stud finder or by measuring from trim. Use a level to ensure holes are plumb, then drill pilot holes into wood studs or concrete anchors into masonry.
- Mount the bracket with corrosion-resistant fasteners (stainless steel or galvanized). Don’t skip this, moisture and salt corrode standard screws, and loose brackets fail fast.
- Run cable to the junction box, using UV-rated outdoor wire (often Thhn/Thwn inside conduit, or direct-burial UF cable per code). Secure cable every 18 inches with clips rated for outdoor use.
- Connect the fixture at the junction box using twist connectors rated for wet locations, then wrap connections with waterproof tape. Ground the fixture to the box ground wire, this isn’t optional.
- Seal the fixture back plate against the wall using exterior-grade silicone caulk. This prevents water from pooling behind the fixture and damaging siding.
- Install bulbs or confirm LEDs, then test under power. Check for proper brightness and that there are no flickering or buzzing sounds (which indicate loose connections or incompatible dimmers).
Ongoing Maintenance
Clean glass or acrylic lens panels twice a year with mild soap and water, salt spray and dust reduce light output over time. Inspect caulk seals annually: re-caulk if gaps appear. LED fixtures are nearly maintenance-free, but if you use incandescent or halogen bulbs, replace them as they dim (typically every 1–2 years).
Check outdoor track lighting alternatives if you’re considering upgrades. Some homeowners find track systems more flexible for repositioning light angles or adding fixtures later. For winter zones, ensure drainage holes in fixture bodies aren’t clogged with ice or debris, water pooling inside leads to corrosion and early failure.
If your sconces use a smart control system (dimmers, scheduling, color-tuning), review the manufacturer’s app settings seasonally. Daylight hours shift, so your automated on/off times may drift from your actual needs by spring and fall.
Conclusion
Outdoor lighting sconces are one of the highest-impact upgrades you can make to your home’s exterior. They’re visible, functional, and, when chosen with intention, they anchor your home’s design while making evening arrivals safer and more inviting. Take time to assess your home’s style, measure your spaces, and plan for proper electrical supply and drainage before buying. Whether you’re installing a single fixture or lighting a full porch, proper prep work and correct installation will reward you with reliable, beautiful light for years to come. Your curb appeal, and your guests’ first impressions, will thank you.


