Table of Contents
ToggleOutdoor LED lighting strips have quietly become one of the most versatile tools in the DIYer’s toolkit. Unlike traditional landscape lighting that requires trenching, transformers, and professional installation, these flexible, low-voltage systems can be mounted almost anywhere, under eaves, along deck railings, behind planters, or under stairs. They draw minimal power, produce virtually no heat, and last for years without maintenance. Whether you’re upgrading security around a dark entryway, adding ambiance to a patio, or outlining architectural features, outdoor LED lighting strips deliver professional results without the contractor bill. This guide walks you through everything from selection to installation to keeping them running strong.
Key Takeaways
- Outdoor LED lighting strips eliminate the need for trenching or professional installation while using 80% less power than traditional landscape lighting, making them an affordable and energy-efficient DIY solution.
- Choosing the right waterproof rating (IP65 for splash-prone areas, IP67 for wet exposure) and color temperature (warm white for ambiance, cool white for security) ensures your outdoor LED lighting strips perform reliably in your specific climate.
- Proper surface preparation—removing dust, roughening glossy finishes, and ensuring complete dryness—is critical to prevent adhesive failure and ensure outdoor LED lighting strips last 5–10 years without peeling.
- Creative applications for outdoor LED lighting strips include deck underbody lighting, landscape accent work, security pathway highlighting, and fence edge outlining to transform your outdoor space visually and functionally.
- Maintenance requires only twice-yearly gentle cleaning, annual connector inspections in humid climates, and winter preparation to extend your outdoor LED lighting strips’ lifespan to their full rated 25,000–50,000 hours.
What Are Outdoor LED Lighting Strips and Why They Matter
Outdoor LED lighting strips are flexible, adhesive-backed or screw-mounted lines of small light-emitting diodes housed in a rigid or semi-rigid channel. Unlike bulky fixtures, they integrate into spaces without demanding attention, until the sun sets and they suddenly transform your outdoor environment.
These strips run on low-voltage power, typically 12V or 24V, supplied by a dedicated transformer or power supply. This matters: low-voltage systems are safer to handle, don’t require a licensed electrician in most jurisdictions, and sidestep the National Electrical Code (NEC) permitting headaches that line-voltage outdoor wiring often triggers. That said, always check your local codes, some regions have specific requirements even for low-voltage outdoor installations.
LED strips are durable, efficient, and compact. A typical outdoor-rated strip consumes 5–15 watts per meter compared to 50+ watts for traditional landscape lighting. They’re also cooler, no heat damage to adjacent materials, and available in single-color, RGB (color-changing), and tunable white options. Waterproof ratings matter here: look for IP65 or IP67 (IP stands for Ingress Protection: IP65 handles jets of water, IP67 survives brief submersion).
Key Benefits for Your Home
First, energy savings are real. LED strips use 80% less power than incandescent or halogen landscape lights, so your electricity bill barely notices them. Second, they last: most rated LED strips deliver 25,000–50,000 hours of life, meaning 5–10 years of nightly use. Third, installation is genuinely DIY-friendly. No running conduit, no digging trenches, no special licensing needed. You clean a surface, peel backing, press the strip down, and plug in the transformer.
They also unlock creative possibilities. Unlike fixed fixtures, LED strips conform to curves, run along edges, and hide behind objects. You can outline deck steps, backlight a pergola, highlight landscape plants, or frame architectural details with surgical precision. Smart-enabled strips (WiFi or Bluetooth) let you adjust brightness, color, and timing from your phone, useful for security schedules or entertaining scenarios.
Choosing the Right Type for Your Space
Not all outdoor LED strips are built the same. Start with water resistance rating. IP65-rated strips handle splash and spray: they work for decks, fence tops, and sheltered eaves. IP67-rated strips tolerate full submersion or prolonged wet exposure: use them near pools, under waterfalls, or in areas prone to standing water. IP68 exists but is overkill for most residential applications and costs more.
Next, decide on color output. Single-color white strips (warm white at 3000K, cool white at 5000K) are the workhorse, excellent for task lighting, security, and accent work. Warm white (3000K) feels inviting around seating areas: cool white punches through fog and highlights architectural features. RGB strips let you cycle through millions of colors and create moods, great for entertaining or seasonal decorations, but use more power and require a compatible controller.
Color temperature also affects appearance. Recent smart home technology news highlights the growing popularity of tunable white strips that shift from warm (evening relaxation) to cool (security alertness) on a schedule. This flexibility costs more upfront but pays back in versatility.
Mounting style matters too. Adhesive-backed strips stick to clean, dry, flat surfaces, fast and reversible. Aluminum channels with lens covers provide durability and look more finished: they’re worth the extra step for visible areas like deck fascias. Corner channels exist for 90-degree turns without folding the strip.
Power supply selection is critical. Small systems (one strip, 5 meters or less) use a simple plug-and-play transformer. Larger installations need a central power supply and potentially a controller to manage brightness or color across multiple strips. WiFi-enabled controllers cost extra but justify themselves if you want scheduling, remote control, or voice integration.
Installation Tips for DIY Success
Installation usually takes an afternoon for a straightforward project. But preparation determines success or failure, rushing surface prep almost always leads to strips peeling away in weeks.
Step 1: Plan the route. Sketch where the strip will run. Account for the power supply location and cord length. Most transformers come with a 6–10 foot cord: plan for it to reach an outlet or use an outdoor-rated extension cord (rated for wet conditions). Note obstacles: corners, texture, or height changes that’ll require channels or extra adhesion.
Step 2: Prepare the surface. This isn’t glamorous, but it’s non-negotiable. Remove dust, dirt, and debris with a dry cloth. If the surface is glossy (painted vinyl, sealed wood), lightly sand or wipe with rubbing alcohol to roughen the adhesive contact zone. On textured surfaces, fill valleys with caulk or use screw-mount channels instead of adhesive. Let any cleaner or primer dry completely, moisture is the enemy of long-term adhesion.
Step 3: Cut and run the strip. Most LED strips have cut lines every 1–2 inches: use sharp diagonal cutters or a utility knife to avoid crushing the circuitry. If the strip includes solder pads for extension cords, keep them protected. Run the strip slowly, pressing firmly as you go. Use corner clips at 90-degree bends to prevent kinking. On curves, apply strips in short sections, pressing gently to conform.
Step 4: Connect power. Follow the manufacturer’s diagram exactly, red to positive, black to negative, no exceptions. If using a controller, wire it between the power supply and strip. Double-check connections before plugging in: a reversed polarity won’t destroy the strip but it won’t light either.
Step 5: Test immediately. Turn on the lights before finalizing mounting. If there’s an issue, fix it while connections are accessible. Flickering often signals a loose wire: a completely dark section suggests a poor solder joint or controller malfunction.
Pro tips: Use step-by-step DIY project tutorials if you’re tackling a complex layout. Waterproof connectors are worth buying if you’re extending a strip, they reduce failure risk. And always secure excess power cord so it doesn’t become a tripping hazard or an eyesore.
Safety: Wear gloves and eye protection when cutting: LED strips have sharp edges. If soldering connections, use a low-wattage iron and ventilation. Never bury power cords in soil or run them through walls without proper conduit, always work within low-voltage guidelines for your jurisdiction.
Design Ideas and Creative Applications
The beauty of LED strips is their adaptability. Here are proven applications that work:
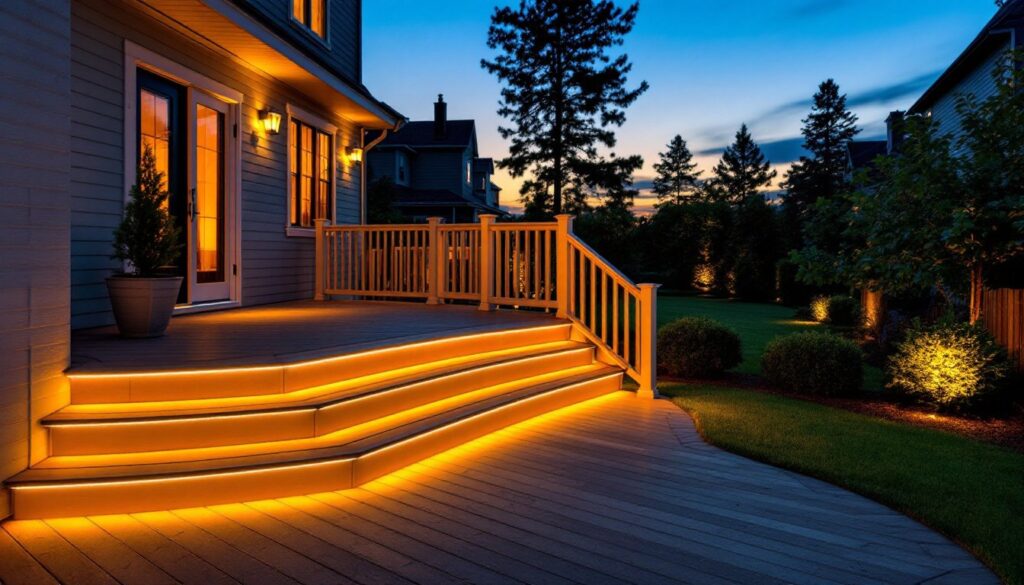
Deck and patio underbody lighting: Mount strips under stair treads, fascia boards, or pergola beams. This creates visual interest, improves safety by illuminating steps, and frames the space without harsh overlighting. Warm white (3000K) feels more inviting for entertaining.
Landscape accent work: Backlight trees, shrubs, or architectural details like fence panels or stone walls. Position the strip behind the object so light spills forward. Use RGB strips for seasonal color, warm tones in fall, cool blues for holiday themes.
Security and entryway highlighting: Line a pathway, outline a front door, or illuminate a dark corner near the garage. Position strips to face visitors, not toward your neighbors. Brighter strips (high lumen output) work here: dimmers are optional if the goal is visibility rather than ambiance.
Fence and railing edge lighting: Adhesive strips conform to horizontal or vertical rails, creating a sleek silhouette. Aluminum channels look polished and protect the electronics from lawn mower damage.
Shelving and niche lighting: Under eave shelving, inside outdoor cabinets, or around recessed storage areas. Soft white or RGB strips add function and style. Products like the Govee Permanent Outdoor Lights Prism showcase how well-designed outdoor strips elevate ordinary spaces.
Budget realistically. A quality outdoor LED strip runs $15–$30 per meter: the transformer and controller add another $30–$100 depending on features. A 10-meter deck project might run $200–$400 in materials. Regional pricing fluctuates, so shop around.
Maintenance and Durability Considerations
Outdoor LED strips are remarkably low-maintenance, but a few habits extend their life.
Cleaning: Once or twice yearly, gently wipe the strip with a damp microfiber cloth. Dried mineral deposits (especially in hard-water regions) can dull the lens cover. If dust accumulates in channels, compressed air works well. Never use harsh chemicals or abrasive scrubbers, they scratch lens covers and degrade adhesive seals.
Winter care: In freeze-thaw climates, check adhesive bonds before winter. Moisture trapped beneath a strip can freeze, lifting the adhesive. If you notice peeling, remove and re-adhere the strip after thorough drying. In snow country, clear snow around mounted strips: the added weight can strain connections.
Connection upkeep: Inspect solder joints and connectors annually for corrosion or looseness, especially in coastal or high-humidity areas. A tiny speck of oxidation on a connector pin can cause intermittent dimming. Tighten set screws and reseat plugs if needed. Keep the transformer and any controller sheltered from direct rain: mount them under an eave or in a weatherproof box.
Lifespan reality: Most outdoor LED strips deliver 25,000–50,000 rated hours. In practical terms, that’s 5–10 years of dusk-to-dawn operation. When individual LEDs dim (not a sudden failure, but gradual), the strip usually still works at reduced brightness. Replacement is straightforward: disconnect, peel off the old strip, and adhere a new one in its place.
Jumping into outdoor lighting ideas projects forces you to think about aesthetics too. Quality doesn’t always mean the most expensive option, it means choosing the right IP rating, color temperature, and mounting method for your specific climate and use case.
Conclusion
Outdoor LED lighting strips deliver versatility, energy efficiency, and professional results on a DIY timeline and budget. The key is honest planning: assess your space, pick the right waterproof rating and color, prepare surfaces meticulously, and test before finalizing mounting. With those foundations in place, you’ll enjoy years of reliable, low-maintenance outdoor ambiance. Light up responsibly, respect your neighbors, and enjoy the transformation.


