Table of Contents
ToggleUnder cabinet LED strip lighting has become one of the most accessible and impactful kitchen upgrades a homeowner can tackle. Whether you’re working with a small galley kitchen or a sprawling island setup, these strips deliver practical task lighting while creating ambiance that makes your space feel polished and intentional. Unlike recessed ceiling fixtures or pendant lights that require extensive wiring and sometimes permits, under cabinet strips plug in, install in hours, and deliver immediate results. The technology has matured enough that you’re no longer choosing between cheap, flickering options and expensive professional-grade systems, there’s genuine middle ground now. This guide walks you through selection, installation, and design strategies to get it right the first time.
Key Takeaways
- Under cabinet LED strip lighting improves both task lighting and kitchen ambiance by eliminating shadows over countertops while making your space feel larger and more intentional.
- Choose strips with 300–500 lumens per linear foot brightness and warm white (2700K) color temperature for a forgiving, universally flattering look that works with most cabinet colors.
- Installation of under cabinet LED lighting strips takes 2–4 hours and requires minimal tools—clean the mounting surface thoroughly with degreaser, plan power cord routing carefully, and apply steady pressure when adhering strips to prevent sagging.
- Strategic placement under your main prep zone and sink area delivers the most practical benefit, while layering under cabinet strips with overhead and pendant fixtures creates a more dynamic lighting design.
- Install a dimmer switch ($15–30) if your LED strips support it to create flexibility between bright task lighting for cooking and soft ambient light for evening entertaining.
What Is Under Cabinet LED Strip Lighting and Why It Matters
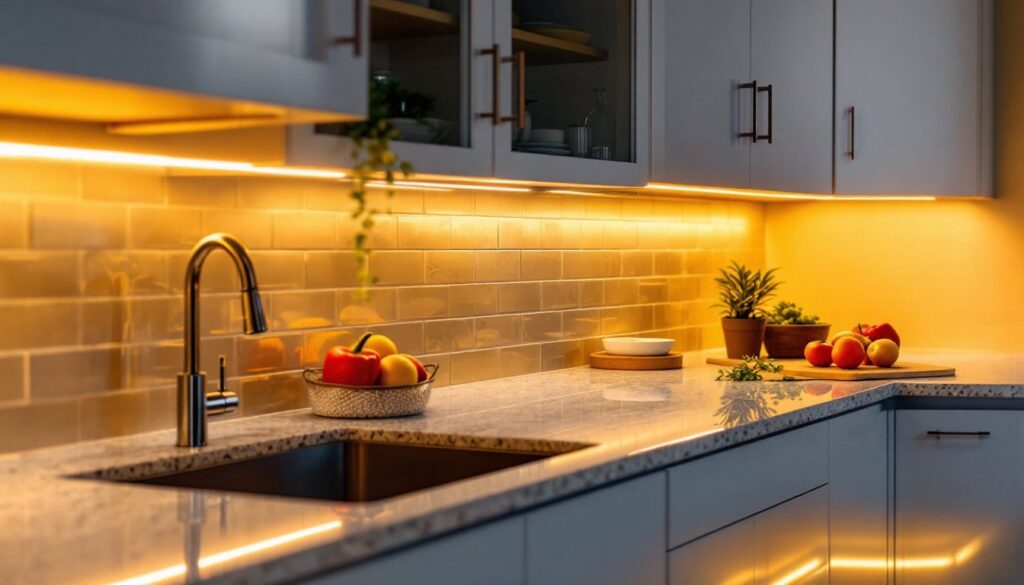
Under cabinet LED strip lighting consists of thin, flexible ribbon-style lights mounted on the underside of your wall cabinets. They shine down onto your countertops, filling the shadow zone that overhead lights often miss. This matters for two reasons: function and feel.
From a practical standpoint, task lighting at counter level reduces eye strain and makes food prep, reading recipes, and cutting safer. You’re not working in your own shadow anymore. The secondary benefit is aesthetic. These strips create a warm layer of light that transforms how your kitchen feels, especially at night. A lit kitchen feels larger, more welcoming, and more intentional, even if you only turn them on occasionally.
Modern LED strips are nothing like the harsh, bluish lights of five years ago. Today’s options span warm whites (2700K), neutral whites (4000K), and even RGB color-changing systems. They’re efficient, they run cool to the touch, and they last. A quality under cabinet tape lighting setup consumes about as much power as a small desk lamp while delivering substantially more practical light.
Choosing the Right LED Strips for Your Kitchen Cabinets
Selecting the right under cabinet lighting strips depends on three variables: your existing kitchen style, the specific tasks you need light for, and your budget.
First, measure your cabinet run. If you have 20 linear feet of cabinets, you need 20 feet of strip (or just the areas you’ll actually use). Many homeowners install strips only under their main prep area and leave the rest dark, which is perfectly fine and saves money.
Next, consider your power source. Some under cabinet strip lighting options plug into standard outlets behind the cabinets, while others hardwire into your existing kitchen circuit. For DIY work, plug-in strips are simpler and don’t require an electrician. Hardwired systems look cleaner but mean working inside walls or running conduit.
Brightness matters more than you’d think. Under cabinet LED lighting strips are typically rated in lumens per foot. For task lighting, aim for 300–500 lumens per linear foot. Too dim and you won’t see much difference: too bright and it feels harsh. Start with mid-range options and adjust if needed.
Brightness, Color Temperature, and Design Options
Color temperature, measured in Kelvin (K), affects how your kitchen feels. Warm white (2700K) feels cozy and is popular for kitchens with traditional or transitional design. Neutral white (4000K) feels crisp and works better in modern or contemporary kitchens. Some reviews of the best under cabinet LED lighting options recommend starting with warm white if you’re unsure: it’s forgiving and pairs with nearly any cabinet color.
Single-color strips are your baseline. They’re simpler, cheaper, and they work. RGB or tunable color-changing systems cost more but let you shift the mood. Some people use warm white for cooking and cool white for entertaining, or they dim to a soft glow for evening.
Profile matters too. Under cabinet tape lighting comes in different widths and shapes. Narrow strips (under 1 inch wide) tuck neatly under cabinets and are nearly invisible. Wider profiles with aluminum channels look more intentional and professional, especially in modern kitchens. Choose based on your cabinet depth and design preference, both are legitimate choices.
Installation Steps: From Planning to Completion
Installing under cabinet tape lighting typically takes 2–4 hours depending on your cabinet layout and wiring setup. It’s one of the few kitchen projects that rarely requires a permit or licensed electrician, though always check your local code.
Start by doing a trial run without adhesive. Lay your strips on the cabinet undersides in the positions you want them. Look for sag, shadows, or spots where the light spills awkwardly onto your backsplash or onto the wall above. Adjust your placement. If you’re using plug-in units, trace where power cords will run and plan how you’ll conceal them, usually behind a cabinet or along the existing backsplash edge.
Before applying adhesive, clean the mounting surface thoroughly. Use a degreaser or rubbing alcohol on a lint-free cloth. Dusty or oily cabinet undersides prevent adhesive from bonding properly, and you’ll find your strips sagging weeks later. Let the surface dry completely.
Tools You’ll Need and Surface Preparation
Gather these tools before you start:
• Wire strippers (if hardwiring) or wire connectors (for plug-in systems)
• Measuring tape and pencil
• Level (sometimes your strips can drift and create uneven light)
• Small screwdriver set for any connector work
• Degreaser or rubbing alcohol and lint-free cloth for cleaning
• Safety glasses (debris can fall during prep)
• Low-tack tape or painter’s tape (optional, for marking positions)
For surface prep: wipe down the cabinet undersides with degreaser. Remove any old adhesive residue using a plastic scraper, metal scrapers can damage the wood. For cabinets that overhang the counter significantly, ensure nothing obstructs the light path. Sometimes a small trim piece or appliance needs to move.
If you’re running a power cord, think carefully about routing. Behind the cabinet, along the baseboard, or through a dedicated channel are your options. Exposed cords look unfinished, so route them out of sight. For hardwired installation, follow step-by-step DIY project guidance and don’t hesitate to call an electrician if you’re unsure about any wiring, incorrect connections are a fire hazard.
Once the surface is clean and dry, peel the adhesive backing and press the strip firmly along your marked line. Apply steady pressure for 30 seconds per foot. If your cabinet undersides are textured, you may need to use mounting brackets instead of relying solely on adhesive: brackets add cost but ensure the strips stay put long-term.
Design Ideas and Best Practices for Maximum Impact
Under cabinet LED lighting strips work best when they’re intentional about illumination zones. Don’t install them everywhere just because you can.
The most effective placement is under your main prep zone and sink area. This is where you need light and where it’ll look natural, your eyes expect light where you work. Extending strips the full length of your cabinets can feel overdone and wastes energy.
Consider layering: use under cabinet strips for task lighting, keep your overhead recessed fixtures for ambient light, and add a recessed lighting design or pendant fixtures over your island for visual interest. Each layer serves a purpose.
For visual continuity, keep your strip profile consistent across the kitchen. Mixing narrow and wide profiles or different brands looks patchy. Choose one system and stick with it.
Cabinet color affects how your light reads. Light-colored cabinets (white, maple, light oak) reflect light and feel bright. Dark cabinets (espresso, charcoal) absorb light, so you may need slightly brighter strips to achieve the same visual effect. Dark cabinets also benefit from warm color temperatures, cool white can feel sterile against dark wood.
Install a dimmer switch if your system supports it. The ability to dial brightness down creates flexibility. Bright for cooking, soft for evenings, off for day. A dimmer costs $15–30 and transforms usability. Check that your LED strips are dimmable before buying: not all are.
Finally, explore comprehensive guides on under cabinet lighting options to compare what others have installed in similar kitchens. Real installations teach you more than marketing copy.
Conclusion
Under cabinet LED strip lighting is a rare home improvement project that delivers visible results within hours and costs between $100–$500 for a typical kitchen. It improves functionality, changes the ambiance, and asks almost nothing of you in terms of skill or time. Whether you choose under cabinet strip lighting, under cabinet led lighting strips, or under cabinet lighting strips, the fundamentals stay the same: clean your surface, measure carefully, plan your wiring, and install with patience. You’ll walk away with a kitchen that looks and feels more intentional, and better lit for the work that happens there.


